
Guide to Upgrade vCenter to 7.x, Roll Back and Fix to known Issues I encounter during the upgrade
- Apr 2, 2022
- 4 min read
Updated: Apr 22, 2022
The purpose of this is to provide the implementation steps to upgrade vCenter to 7.0U2
Before performing the upgrade verify the following.
- You will need a temporary IP Address
- Verify there is sufficient Datastore space in the same cluster as the Source vCenter appliance to deploy another vCenter server.
- Verify root credentials are able to ssh to appliance.
- Verify you are able to log into the vCenter server with the local admin password
DO NOT take a snapshot of the source appliance yet, this is to be done when you reach Stage 2 of the Deployment
- Verify there are no snapshots against the source vCenter. If there are, remove them prior to starting upgrade.
Steps to Upgrade the vCenter.
Stage 1
- Download the VCSA ISO here https://customerconnect.vmware.com/downloads/#all_products
- Installer location: D:\VMware\vSphere 7\vCenter 7.0u2\VMware-VCSA-all-7.0.2-17958471.iso
- Double click on the installer iso after that double click on installer.exe from the vcsa-ui-installer\win32 folder
- Open the installer and Select Upgrade

- Click Next

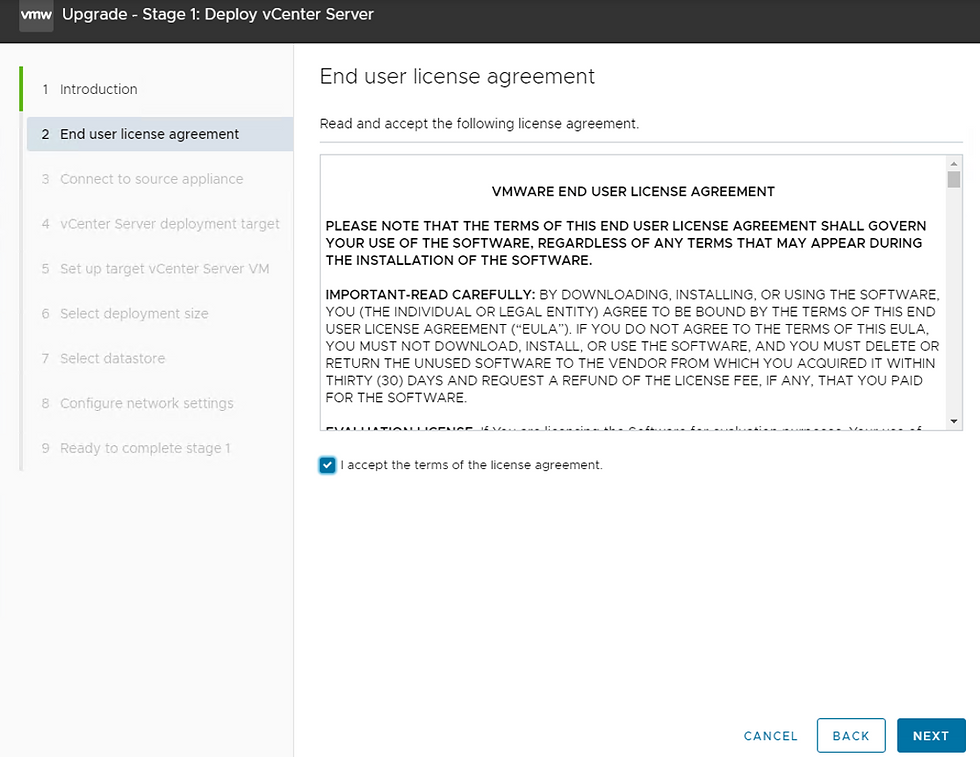
- Accept Agreement and Click Next
- Enter the vSphere FQDN you wish to upgrade and click Connect to Source

- Enter the following information
1. The .local account for the source appliance
2. The .local account password
3. The Appliance Root Password or ESXi Root Password where the VCSA is resided then Click Next

- Click Yes

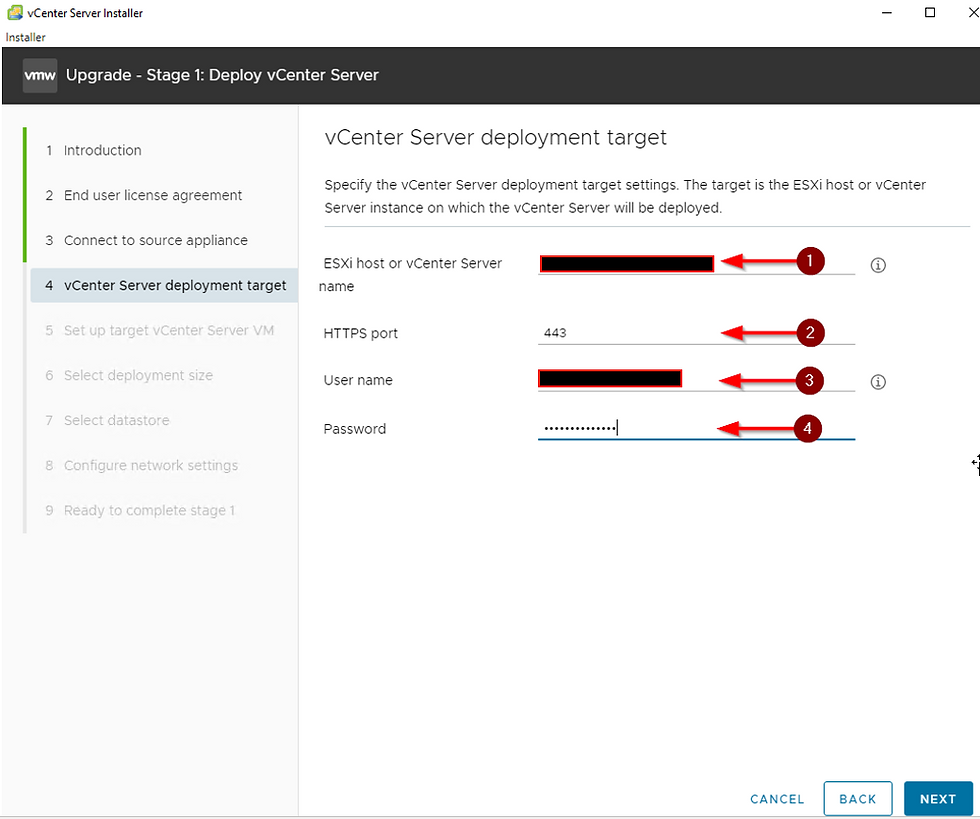
- This is the details on where you want to deploy the temporary appliance.
1. The vCenter or ESXi server where the appliance will be deployed.
2. Leave port as default
3. Login Domain Account or vCenter/ESXi Root
4. Enter password and Click Next
- Click Yes

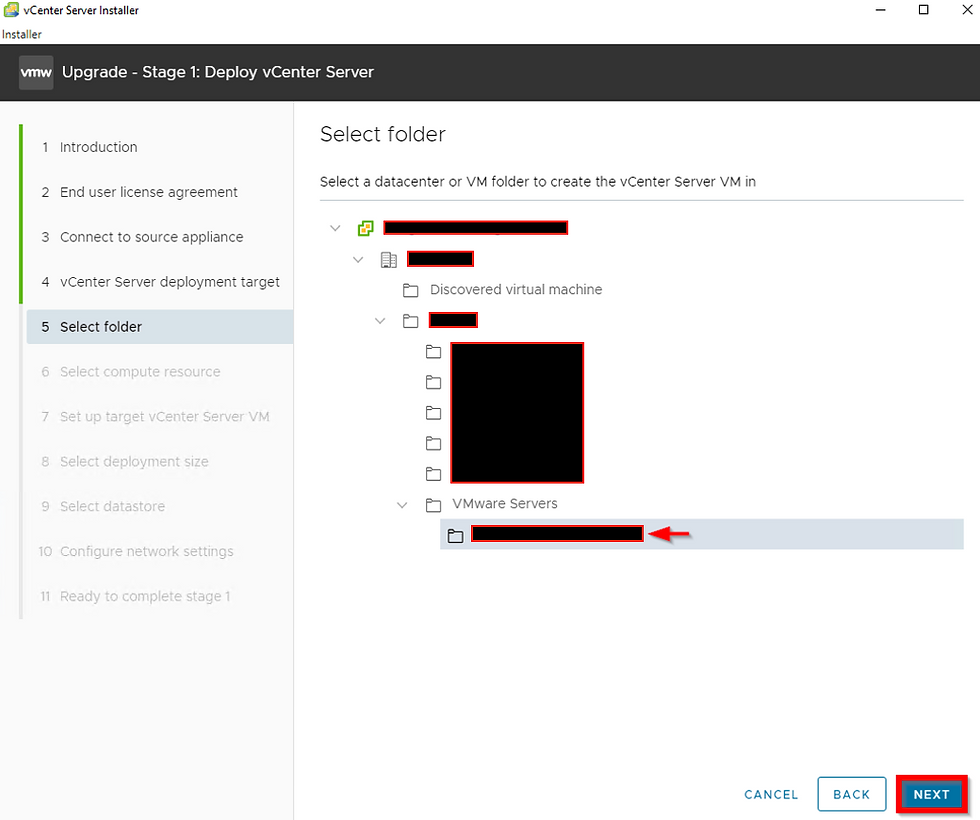
- Choose the same folder as the source appliance.
- Choose the same cluster as the Source Appliance

- Name the Target vCenter and set the same root password as the source appliance.

- Set the Deployment size as close as you can as the source appliance, Click Next

- Choose Datastore for target appliance, Click Next

- This is the details on where you set the Network Configuration Settings
1. Same Network VLAN as Source Appliance
2. IPv4
3. Static
4. Temporary IP Address of Appliance
5. Same Subnet Mask as source appliance.
6. Same default Gateway as source appliance
7. The same DNS servers as the Source Appliance.

- Click Finish

- Click Continue

Stage 2
- If you have any issues with the installer, you can browse to the VAMI on https://TEMP IP ADDRESS:5480 to continue the upgrade.
- Now Take a Snapshot of your Source Appliance
Note: Before Processing with Stage 2, Update the Distributed Switch to 6.5
Backup vDS Configuration:
- Locate a distributed port group in the vSphere Web Client.
- Select a distributed switch and click the Networks tab.
- Click Distributed Port Groups.
- Right-click the distributed port group and select Export Configuration.
- Click OK.
- Click Yes to save the configuration file
Update vDS to 6.5:
- In the vSphere Web Client, navigate to the distributed switch.
- Right-click the distributed switch and select Upgrade > Upgrade Distributed Switch.
- Select the vSphere Distributed Switch version that you want to upgrade the switch to and - click Next.
- Browse the link https://<vc-ip>:5480/configure/ and continue with upgrade change url to https://TEMP_IP:5480/configure/#/installer?locale=en
- Now Stage 2 Configuration show up and Click Next

- If using the installer everything should prepopulate

- Wait until checks are complete

- Review output from Upgrade check. If any are critical you will need to address these before continuing.

- Choose configuration, Inventory, Tasks and Events

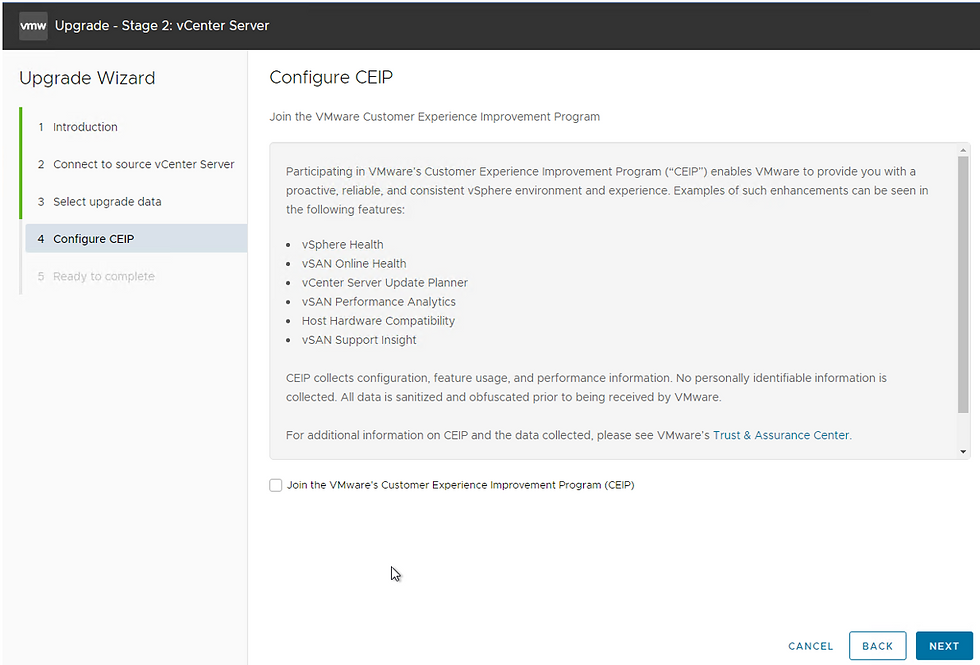
- Untick the check box for the CEIP and click Next
- Ensure Source vCenter has a backup then check the I have backed up the source vCenter server option and click Finish

- Click OK and Wait for Upgrade to complete


- Now Stage 2 is Completed you can Click Close

Perform the below Verification Checks to confirm a successful upgrade
- Make sure you can successfully login to the vCenter using your Domain and Local Admin account
- Review vCenter Alarms to verify there are no issues.
- Verify all hosts are connected
- Verfiy vcls vms are created and powered on (These can be found in VM and templates) View.
- Login to SSH and make sure you can access the VCSA using Root account
Perform the below tasks once all Verification Steps are successful
- License the vCenter Server with a vSphere 7 license - Drag vSphere 7 appliance in the correct Resource Pool if needed - Set root account to never expire in the VAMI
- Log into the VAMI and verify the timezone is set according to your timezone or NTP Server
- After a week you can delete the Snapshot of old Appliance and Delete Old Appliance
Roll Back
- The following actions need to be performed for a complete Roll back
- In the vsphere 7 appliance delete the vcls VMs
- Shut down the vSphere 7 Appliance.
- Revert old 6.5 Appliance from the snapshot created at Stage 2
- Log into vCenter (6.5)
- You will see alerts for “HA” to remediate this Disable and Reenable HA on each Cluster.
Known Issues I encounter during the upgrade
* FQDN mismatch ( You may get the below error when running the Pre-Requisite checks on stage 2 )

In this example we will be changing the hostname from VCSA.vmware.local to VCSA.VMWARE.LOCAL
To resolve this: - Access the VCSA from console or from Putty session. - Login with root permission
- Type ‘shell’ then press Enter - Use command shown below in the command prompt of VCSA : /opt/vmware/share/vami/vami_config_net
- Opt for option 3 (Hostname)
- Change the hostname to new name
- Ctl Z to exit command
* Certificate Error
- You get the below error during the pre-req checks in stage 2

To resolve this:
- login to VCSA as root
- Run cmd - to enable winscp chsh -s "/bin/bash" root
- Using winscp copy ls_ssltrust_fixer_3.py ( You can get the Copy to the vCenter Server Appliance Installer ) Copy to /usr/lib/vmidentity/tools/scripts
- On the VCSA Run the below commands:
python ls_ssltrust_fixer_3.py -f scan
python ls_ssltrust_fixer_3.py -f fix
- Enter username with quote as "Administrator@...." - Enter Administrator password
- Retry the Upgrade Pre Checks
* Host Profiles
- You get the below error during the pre-req checks in stage 2

To resolve this:
- Log into the vCenter and browse to the Host Profiles. If you see any Host profiles still on 5.5 or 6.0 you will need to either update the reference host or delete the host profile.
NOTE: Only delete the host profile if there are no Hosts attached
VMware KB Reference.
VMware Documentation Center: https://docs.vmware.com/en/VMware-vSphere/index.html
ESXi Hardware Requirements: https://docs.vmware.com/en/VMware-vSphere/7.0/com.vmware.esxi.upgrade.doc/GUID-DEB8086A-306B-4239-BF76-E354679202FC.html#:~:text=ESXi%207.0%20requires%20a%20minimum,Gigabit%20or%20faster%20Ethernet%20controllers.


Comments